
ご注意下さい
この記事は3年以上前に書かれた記事ですので、内容が古い可能性があります。
なななんと、iOS10からVPNがPPTPに対応しなくなったのですね。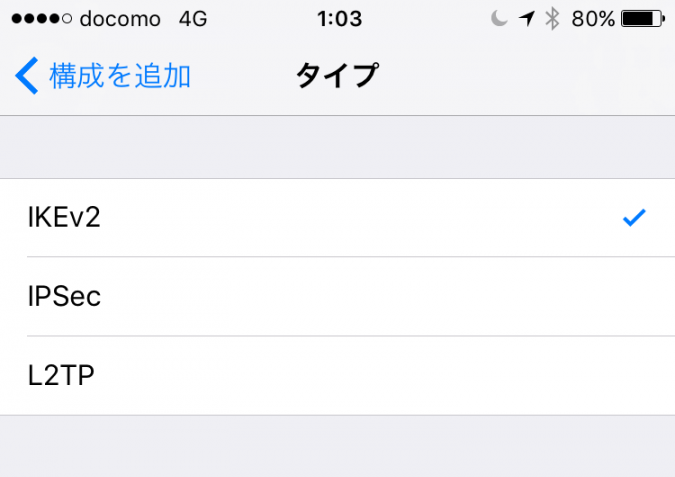
しかもNVR500はPPTPにしか対応していないし。バージョンアップで対応してくれないかしら。
多分無理だろう、ということでCentOS7上にVPNサーバを作ってしまいます。
実は記事にはしていませんが以前openswan(IPsec)/xl2tpd(L2TP)で構築した経験はあります。
-
-
L2TP/IPsecはRT57iのPPTPより4倍もスループットがいい件
こんなにスピードが違うとは…。正直驚きです。 最新のNVR500などでは違うのでしょうがYamahaのブロードバンドルーターRT57iとiPhoneで …
ということでCentOS7では初めてですがまぁそんなに難しくはないと思うのでサクっと構築してしまいましょう。
この記事のもくじ
インストール
EPELのレポジトリのインストール
xl2tpdは標準のレポジトリにはないので、EPELレポジトリを追加します。
これでインストールできますが、後々悪さをしないようにデフォルトではdisableにしたいと思います。/etc/yum.repos.d/epel.repoを編集します。
[epel]
name=Extra Packages for Enterprise Linux 7 - $basearch
#baseurl=http://download.fedoraproject.org/pub/epel/7/$basearch
mirrorlist=https://mirrors.fedoraproject.org/metalink?repo=epel-7&arch=$basearch
failovermethod=priority
enabled=0
gpgcheck=1
gpgkey=file:///etc/pki/rpm-gpg/RPM-GPG-KEY-EPEL-7
xl2tpd(L2TP)のインストール
EPELレポをdisableにしているので、以下のようにインストールします。
読み込んだプラグイン:fastestmirror
epel/x86_64/metalink | 5.9 kB 00:00:00
epel | 4.3 kB 00:00:00
(1/3): epel/x86_64/primary_db | 4.4 MB 00:00:05
(2/3): epel/x86_64/updateinfo | 691 kB 00:00:11
(3/3): epel/x86_64/group_gz | 170 kB 00:00:17
Loading mirror speeds from cached hostfile
* base: ftp.iij.ad.jp
* epel: ftp.riken.jp
* extras: ftp.iij.ad.jp
* updates: ftp.iij.ad.jp
依存性の解決をしています
--> トランザクションの確認を実行しています。
---> パッケージ xl2tpd.x86_64 0:1.3.8-1.el7 を インストール
--> 依存性の処理をしています: kmod(l2tp_ppp.ko) のパッケージ: xl2tpd-1.3.8-1.el7.x86_64
--> 依存性解決を終了しました。
エラー: パッケージ: xl2tpd-1.3.8-1.el7.x86_64 (epel)
要求: kmod(l2tp_ppp.ko)
問題を回避するために --skip-broken を用いることができます。
これらを試行できます: rpm -Va --nofiles --nodigest
なんと、エラーが…。なんでいつもうまくいかないんでしょうか。調べてみると、
Paul Stauffer 2016-12-20 08:09:16 EST
Note that the broken package is in the release "epel" repo, not just in "epel-testing", so production systems are seeing this as well.
FWIW, here's the changelog line Tuomo is referring to:
* Fri Oct 31 2014 Paul Wouters <pwouters@redhat.com> - 1.3.6-7
- Remove kmod require, not recognised and l2tp_ppp.ko is in core kernel package now
とありました。とりあえず、epel-testingレポを使ってみることとします。
読み込んだプラグイン:fastestmirror
epel-testing/x86_64/metalink | 6.1 kB 00:00:00
epel-testing | 4.3 kB 00:00:00
epel-testing/x86_64/primary_db FAILED
http://kartolo.sby.datautama.net.id/EPEL/testing/7/x86_64/repodata/f19a1d391fc2fb7e831cec9fdaa3506f384c4378413b861899d1f9fa6a52d6d6-primary.sqlite.xz: [Errno 14] HTTP Error 404 - Not Found
他のミラーを試します。
To address this issue please refer to the below knowledge base articlehttps://access.redhat.com/articles/1320623
If above article doesn't help to resolve this issue please create a bug on https://bugs.centos.org/
epel-testing/x86_64/updateinfo FAILED
http://epel.excellmedia.net/testing/7/x86_64/repodata/a0bd23f29b8d89509ba3493d44a570f4e62f2f29127da96cd9969e95e6e79bda-updateinfo.xml.bz2: [Errno 14] HTTP Error 404 - Not Found
他のミラーを試します。
(1/3): epel-testing/x86_64/group_gz | 170 kB 00:00:01
epel-testing/x86_64/primary_db FAILED
https://mirrors.tuna.tsinghua.edu.cn/epel/testing/7/x86_64/repodata/f19a1d391fc2fb7e831cec9fdaa3506f384c4378413b861899d1f9fa6a52d6d6-primary.sqlite.xz: [Errno 14] HTTPS Error 404 - Not Found
他のミラーを試します。
(2/3): epel-testing/x86_64/primary_db | 673 kB 00:00:00
epel-testing/x86_64/updateinfo FAILED
https://ftp.yzu.edu.tw/Linux/Fedora-EPEL/testing/7/x86_64/repodata/a0bd23f29b8d89509ba3493d44a570f4e62f2f29127da96cd9969e95e6e79bda-updateinfo.xml.bz2: [Errno 14] HTTPS Error 404 - Not Found
他のミラーを試します。
(3/3): epel-testing/x86_64/updateinfo | 93 kB 00:00:00
Loading mirror speeds from cached hostfile
* base: ftp.iij.ad.jp
* epel-testing: ftp.yzu.edu.tw
* extras: ftp.iij.ad.jp
* updates: ftp.iij.ad.jp
依存性の解決をしています
--> トランザクションの確認を実行しています。
---> パッケージ xl2tpd.x86_64 0:1.3.8-2.el7 を インストール
--> 依存性解決を終了しました。
依存性を解決しました
=======================================================================================================
Package アーキテクチャー バージョン リポジトリー 容量
=======================================================================================================
インストール中:
xl2tpd x86_64 1.3.8-2.el7 epel-testing 97 k
トランザクションの要約
=======================================================================================================
インストール 1 パッケージ
総ダウンロード容量: 97 k
インストール容量: 189 k
Is this ok [y/d/N]:
とのことで行けそうです。
openswan(IPsec)のインストール
こちらは上記で問題なくインストールできました。
設定
xl2tpdの設定
/etc/xl2tpd/xl2tpd.confを編集します。編集するのはxl2tpdをインストールしたサーバーのIPアドレスとiPhoneなどリモート側に割り当てるIPアドレスだけです。
;
; This is a minimal sample xl2tpd configuration file for use
; with L2TP over IPsec.
;
; The idea is to provide an L2TP daemon to which remote Windows L2TP/IPsec
; clients connect. In this example, the internal (protected) network
; is 192.168.1.0/24.  A special IP range within this network is reserved
; for the remote clients: 192.168.1.128/25
; (i.e. 192.168.1.128 ... 192.168.1.254)
;
; The listen-addr parameter can be used if you want to bind the L2TP daemon
; to a specific IP address instead of to all interfaces. For instance,
; you could bind it to the interface of the internal LAN (e.g. 192.168.1.98
; in the example below). Yet another IP address (local ip, e.g. 192.168.1.99)
; will be used by xl2tpd as its address on pppX interfaces.

[global]
; listen-addr = 192.168.1.98
;
; requires openswan-2.5.18 or higher - Also does not yet work in combination
; with kernel mode l2tp as present in linux 2.6.23+
; ipsec saref = yes
; Use refinfo of 22 if using an SAref kernel patch based on openswan 2.6.35 or
;  when using any of the SAref kernel patches for kernels up to 2.6.35.
; saref refinfo = 30
;
; force userspace = yes
;
; debug tunnel = yes

[lns default]
ip range = 192.168.10.201-192.168.10.210
local ip = 192.168.10.100
require chap = yes
refuse pap = yes
require authentication = yes
name = LinuxVPNserver
ppp debug = yes
pppoptfile = /etc/ppp/options.xl2tpd
length bit = yes
次に/etc/ppp/options.xl2tpdを編集します。
3行目でDNSサーバを接続元に渡す指定します。crtscts、lockオプションはエラーとなるのでコメントアウト。
Dec 25 22:47:28 localhost xl2tpd: /usr/sbin/pppd: In file /etc/ppp/options.xl2tpd: unrecognized option 'crtscts'
Dec 25 22:53:07 localhost pppd[5039]: In file /etc/ppp/options.xl2tpd: unrecognized option 'lock'
Dec 25 22:53:07 localhost xl2tpd: /usr/sbin/pppd: In file /etc/ppp/options.xl2tpd: unrecognized option 'lock'
認証方式はMSChap-v2のみを許可します(29-32行)。最終行の"name" では、認証に使用するアカウント名を設定します。この名前を "/etc/ppp/chap-secrets"に記入します。
ipcp-accept-local
ipcp-accept-remote
ms-dns 192.168.10.100
# ms-dns  8.8.8.8
# ms-dns  192.168.1.1
# ms-dns  192.168.1.3
# ms-wins 192.168.1.2
# ms-wins 192.168.1.4
noccp
auth
#crtscts
idle 1800
mtu 1410
mru 1410
#mtu 1500
#mru 1500
nodefaultroute
debug
#lock
proxyarp
connect-delay 5000
# To allow authentication against a Windows domain EXAMPLE, and require the
# user to be in a group "VPN Users". Requires the samba-winbind package
# require-mschap-v2
# plugin winbind.so
# ntlm_auth-helper '/usr/bin/ntlm_auth --helper-protocol=ntlm-server-1 --require-membership-of="EXAMPLEVPN Users"'
# You need to join the domain on the server, for example using samba:
# http://rootmanager.com/ubuntu-ipsec-l2tp-windows-domain-auth/setting-up-openswan-xl2tpd-with-native-windows-clients-lucid.html
refuse-pap
refuse-chap
refuse-mschap
require-mschap-v2
name xl2tpd
/etc/ppp/chap-secretにパスワードを指定します。
# Secrets for authentication using CHAP
# client        server  secret                  IP addresses
"hogehoge"       "xl2tpd"        "password"        *
接続を許可するIPアドレスに「*」を指定しないと、以下のようにエラーが出て接続できないので注意が必要です。
Dec 25 23:00:25 localhost xl2tpd: /usr/sbin/pppd: but I couldn't find any suitable secret (password) for it to use to do so.
Dec 25 23:00:25 localhost xl2tpd: /usr/sbin/pppd: (None of the available passwords would let it use an IP address.)
Dec 25 23:00:25 localhost pppd[5805]: but I couldn't find any suitable secret (password) for it to use to do so.
openswanの設定
/etc/ipsec.confを編集します。
14行目をコメントアウトし、57-60行目を追加です(14行目は58行目に持っていっています。順番も重要という話もあるので)。
# /etc/ipsec.conf - Libreswan IPsec configuration file

# This file:  /etc/ipsec.conf
#
# Enable when using this configuration file with openswan instead of libreswan
#version 2
#
# Manual:     ipsec.conf.5

# basic configuration
config setup
        # which IPsec stack to use, "netkey" (the default), "klips" or "mast".
        # For MacOSX use "bsd"
        #protostack=netkey
        #
        # Normally, pluto logs via syslog. If you want to log to a file,
        # specify below or to disable logging, eg for embedded systems, use
        # the file name /dev/null
        # Note: SElinux policies might prevent pluto writing to a log file at
        #       an unusual location.
        #logfile=/var/log/pluto.log
        #
        # The interfaces= line is only required for the klips/mast stack
        #interfaces="%defaultroute"
        #interfaces="ipsec0=eth0 ipsec1=ppp0"
        #
        # If you want to limit listening on a single IP - not required for
        # normal operation
        #listen=127.0.0.1
        #
        # Do not set debug options to debug configuration issues!
        #
        # plutodebug / klipsdebug = "all", "none" or a combation from below:
        # "raw crypt parsing emitting control kernel pfkey natt x509 dpd
        #  private".
        # Note: "crypt" is not included with "all", as it can show confidential
        #       information. It must be specifically specified
        # examples:
        # plutodebug="control parsing"
        # plutodebug="all crypt"
        # Again: only enable plutodebug or klipsdebug when asked by a developer
        #plutodebug=none
        #klipsdebug=none
        #
        # Enable core dumps (might require system changes, like ulimit -C)
        # This is required for abrtd to work properly
        # Note: SElinux policies might prevent pluto writing the core at
        #       unusual locations
        dumpdir=/var/run/pluto/
        #
        # NAT-TRAVERSAL support
        # exclude networks used on server side by adding %v4:!a.b.c.0/24
        # It seems that T-Mobile in the US and Rogers/Fido in Canada are
        # using 25/8 as "private" address space on their wireless networks.
        # This range has never been announced via BGP (at least upto 2015)
        #virtual_private=%v4:10.0.0.0/8,%v4:192.168.0.0/16,%v4:172.16.0.0/12,%v4:25.0.0.0/8,%v4:100.64.0.0/10,%v6:fd00::/8,%v6:fe80::/10
        nat_traversal=yes
        protostack=netkey
        virtual_private=%v4:192.168.10.0/24
        oe=off

# For example connections, see your distribution's documentation directory,
# or https://libreswan.org/wiki/
#
# There is also a lot of information in the manual page, "man ipsec.conf"
#
# It is best to add your IPsec connections as separate files in /etc/ipsec.d/
include /etc/ipsec.d/*.conf
/etc/ipsec.d/l2tp-ipsec.confを以下の通り新規に作成します。
conn L2TP-PSK-NAT
    rightsubnet=0.0.0.0/0
    dpddelay=10
    dpdtimeout=20
    dpdaction=clear
    forceencaps=yes
    also=L2TP-PSK-noNAT

conn L2TP-PSK-noNAT
    authby=secret
    pfs=no
    auto=add
    keyingtries=3
    rekey=no

    ikelifetime=8h
    keylife=1h

    type=transport

    left=%defaultroute
    leftprotoport=17/1701

    right=%any
    rightprotoport=17/%any
また、ipsec.secretsファイルをroot:root 600で作成します。
: PSK "VPN password"
最後にOS起動時に自動起動するように設定します。
# systemctl enable ipsec
# systemctl start xl2tpd
# systemctl start ipsec
IPフォワードとFirewalldの設定
Verifying installed system and configuration filesVersion check and ipsec on-path [OK]
Libreswan 3.15 (netkey) on 3.10.0-514.2.2.el7.x86_64
Checking for IPsec support in kernel [OK]
NETKEY: Testing XFRM related proc values
ICMP default/send_redirects [OK]
ICMP default/accept_redirects [OK]
XFRM larval drop [OK]
Pluto ipsec.conf syntax [OK]
Hardware random device [N/A]
Two or more interfaces found, checking IP forwarding [FAILED]
Checking rp_filter [ENABLED]
/proc/sys/net/ipv4/conf/all/rp_filter [ENABLED]
/proc/sys/net/ipv4/conf/default/rp_filter [ENABLED]
/proc/sys/net/ipv4/conf/eth0/rp_filter [ENABLED]
/proc/sys/net/ipv4/conf/eth1/rp_filter [ENABLED]
/proc/sys/net/ipv4/conf/ip_vti0/rp_filter [ENABLED]
rp_filter is not fully aware of IPsec and should be disabled
Checking that pluto is running [OK]
Pluto listening for IKE on udp 500 [OK]
Pluto listening for IKE/NAT-T on udp 4500 [OK]
Pluto ipsec.secret syntax [OK]
Checking 'ip' command [OK]
Checking 'iptables' command [OK]
Checking 'prelink' command does not interfere with FIPSChecking for obsolete ipsec.conf options [OK]
Opportunistic Encryption [DISABLED]
ipsec verify: encountered 11 errors - see 'man ipsec_verify' for help
IPフォワードの設定が必要でした。環境に合わせて書く必要がありますが、私の環境はeth1もありますので、18-19行目を書いています。
# sysctl settings are defined through files in
# /usr/lib/sysctl.d/, /run/sysctl.d/, and /etc/sysctl.d/.
#
# Vendors settings live in /usr/lib/sysctl.d/.
# To override a whole file, create a new file with the same in
# /etc/sysctl.d/ and put new settings there. To override
# only specific settings, add a file with a lexically later
# name in /etc/sysctl.d/ and put new settings there.
#
# For more information, see sysctl.conf(5) and sysctl.d(5).
net.ipv4.ip_forward = 1
net.ipv4.conf.all.send_redirects = 0
net.ipv4.conf.all.accept_redirects = 0
net.ipv4.conf.default.send_redirects = 0
net.ipv4.conf.default.accept_redirects = 0
net.ipv4.conf.eth0.send_redirects = 0
net.ipv4.conf.eth0.accept_redirects = 0
net.ipv4.conf.eth1.send_redirects = 0
net.ipv4.conf.eth1.accept_redirects = 0
net.ipv4.conf.lo.send_redirects = 0
net.ipv4.conf.lo.accept_redirects = 0
sysctl -pで設定を反映した後に、再度ipsec verifyを実施し、先ほどFAILEDであったIP Fowarding部分が[OK]になっていることを確認してください。
firewalldへパケットの受信とIPフォワーディングの設定を行います。
# firewall-cmd --permanent --add-port=1701/udp
# firewall-cmd --permanent --add-port=4500/udp
# firewall-cmd --permanent --add-masquerade
# firewall-cmd --reload
NVR500の設定
NVR500に入って以下の設定をしましょう。filterの番号は自身の環境に合わせてください。Web画面からの設定でいいと思います。NATの設定はtelnet等でログインしないと設定できません。
ip filter 2 pass 192.168.10.100 * esp * *
ip filter 3 pass * 192.168.10.100 udp,tcp * 500,1701,4500
ip filter 4 pass 192.168.10.100 * udp,tcp 500,1701,4500 *
nat descriptor masquerade static 1000 16 192.168.10.100 esp
nat descriptor masquerade static 1000 17 192.168.10.100 udp 1701
nat descriptor masquerade static 1000 18 192.168.10.100 udp 500
nat descriptor masquerade static 1000 19 192.168.10.100 udp 4500
以上で設定は完了です。